Unite 21.2
3Shape Unite is now out with its first update that delivers a significantly improved user experience with many new features, including: favorites for your materials and implant manufacturers in the guided order form; setting the delivery date; editing case instructions and attaching photos on the send page and much more.
In the Guided Order Form
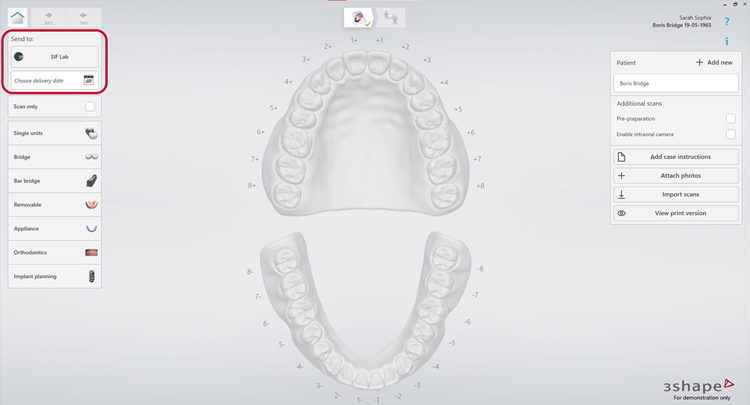
NEW Placement of the delivery date
Based on input from users, the delivery date has now been left aligned in the top right corner of the guided order form, making it a more natural step when filling out the order completely.
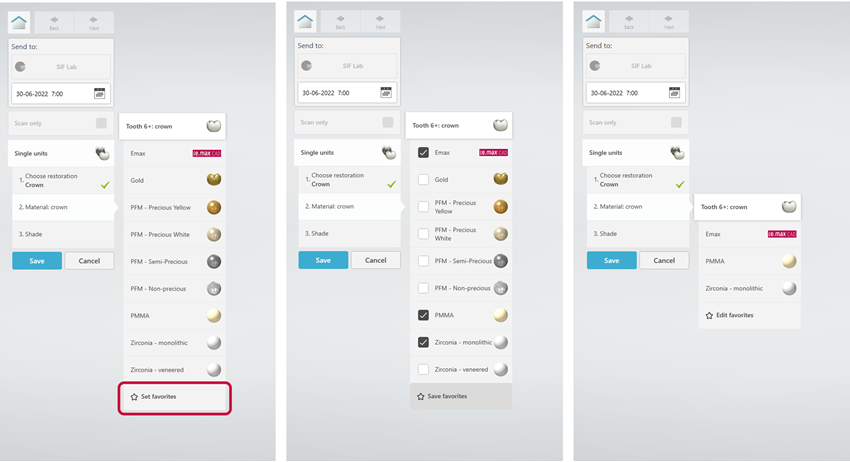
NEW Favorites in the guide order form
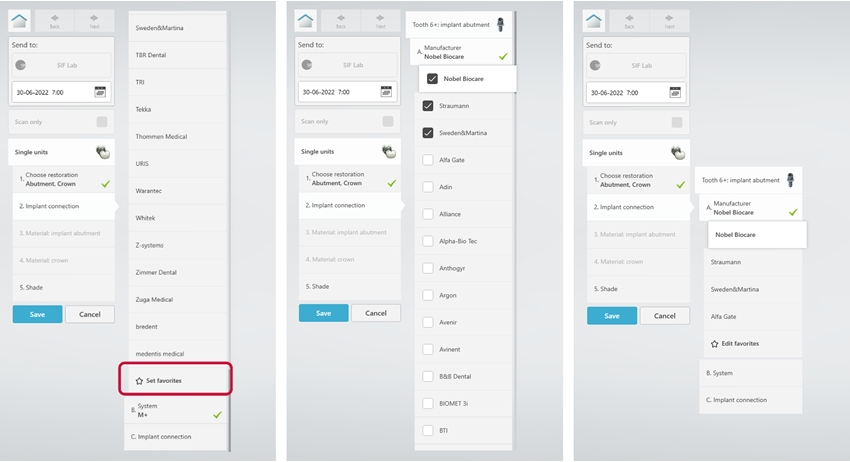
Why go through the many options, if you are only using a few of the options in each category? Now you can set up favorites for materials and implant manufacturers.
Favorite Material for all indications
Favorite Implant Abutment Manufacturer
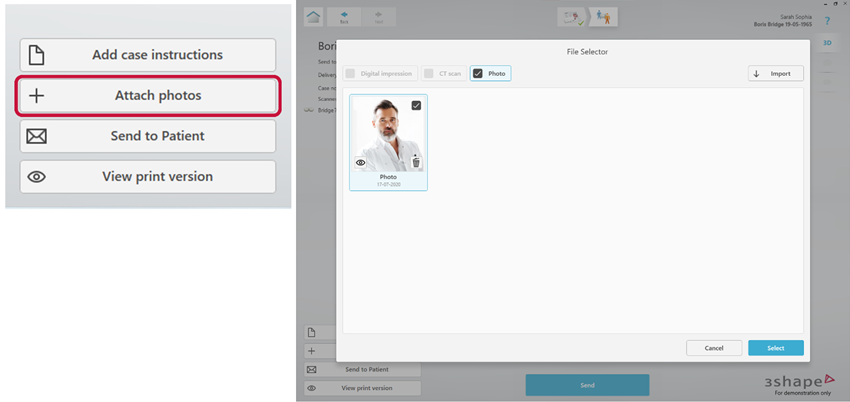
NEW Way to Easy attach images/medias and send them to the lab
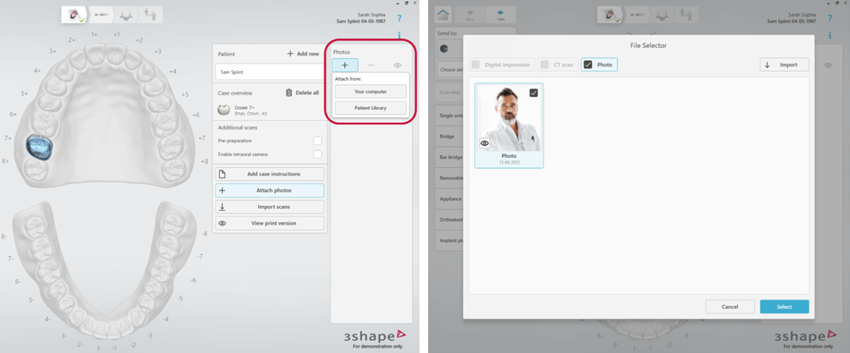
When sending a case to a lab, it can be relevant to attach a few photos to provide the correct context for the lab technician. Now we have made it possible for you to attach photos straight from the desk or directly from the Patient Media Library, allowing you to use what you have already imported.
NEW Way of multi-applying same material and shade to multiple indications
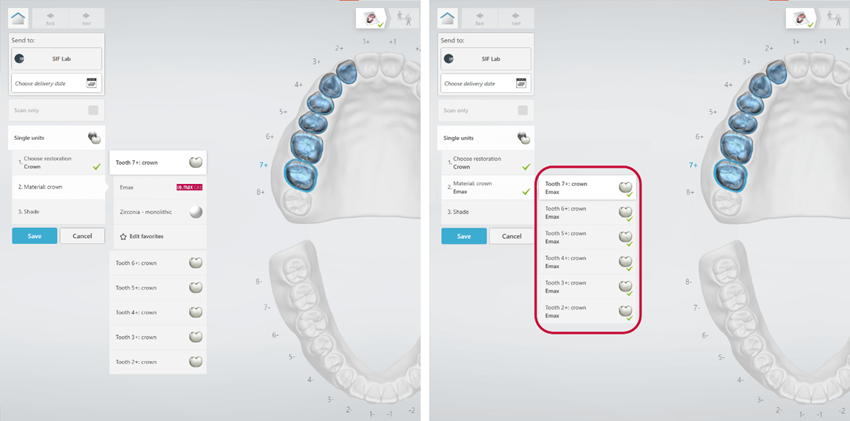
In situations where a patient needs multiple single units, it most often will be with the same material and sometimes the same shade depending on where the teeth are placed. We have therefore optimized the order form by making the first material and shade apply to all the same indications. Allowing you to fill out the order form more efficiently and faster. Should one material or shade be different from others, it is easy to edit by clicking on the relevant tooth in the material/shade list.
RETURNED Possibility to add virtual crowns in implant workflows
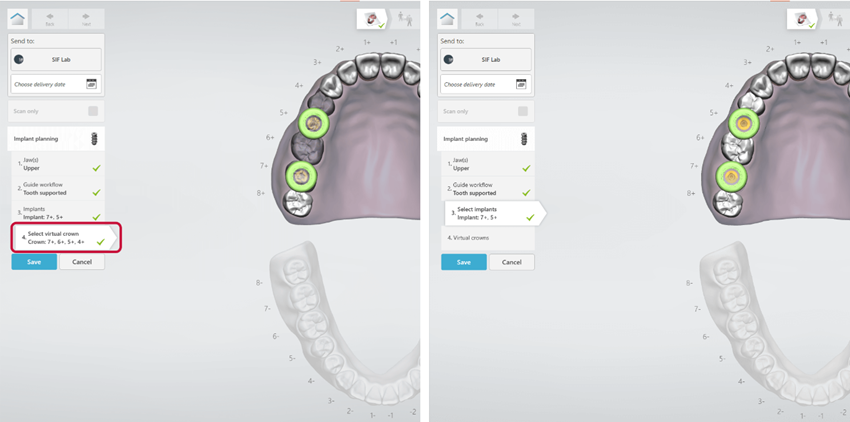
It is now again possible to add as many virtual crowns as you want in an implant workflow. Not only on top of an implant abutment, but also next to or another desired placed in the mouth according to your treatment. For instance, this will make it possible to imitate a bridge by adding a virtual crown between two implants - a practice used by implantologists.
NEW Improvements to the buttons in the right-side panel
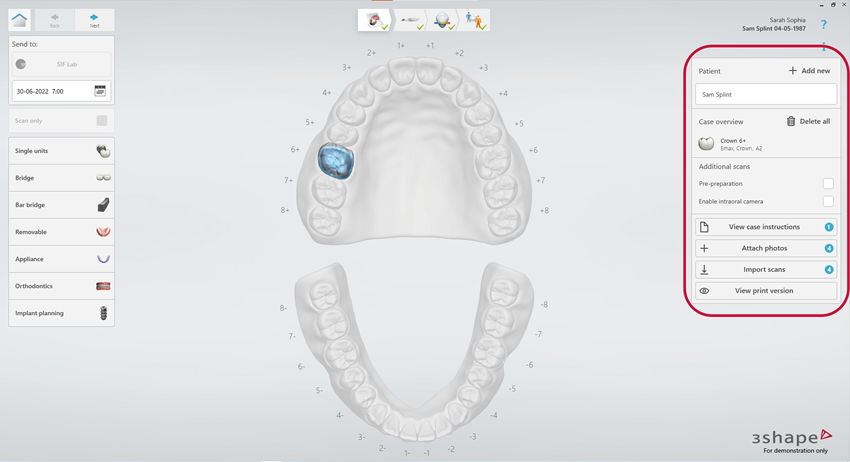
We have updated the visual experience, with new icons to make the buttons, more noticeable and easier to tick-off, when for instance enabling a pre-preparation scan or the intraoral camera.
NEW Improved visual feedback on attachment in the order form and on send page
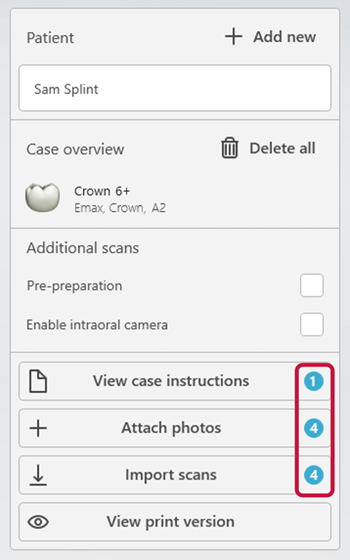
Another improvement we have made to right side panel in the guided order form and on the send, page is introducing a little visual feedback to when attachments, case instructions or imported scans have been added. Once you have completed the action, a blue dot and a number corresponding to the number of things that have been added is shown and you can safely continue your treatment.
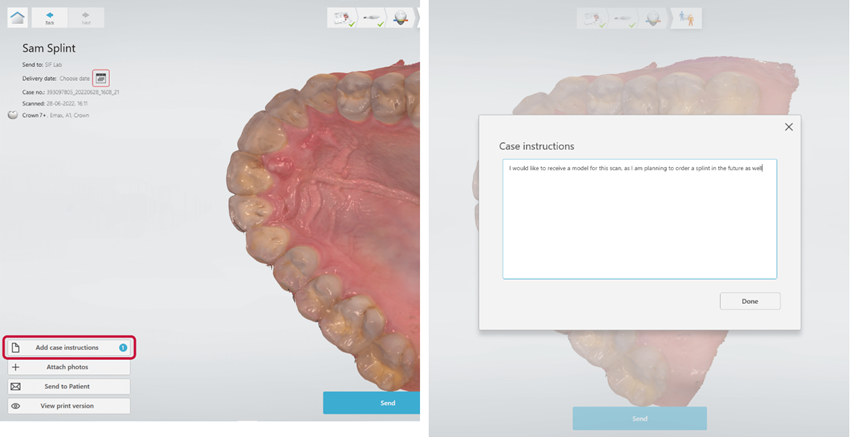
NEW Improved case instructions in the order form
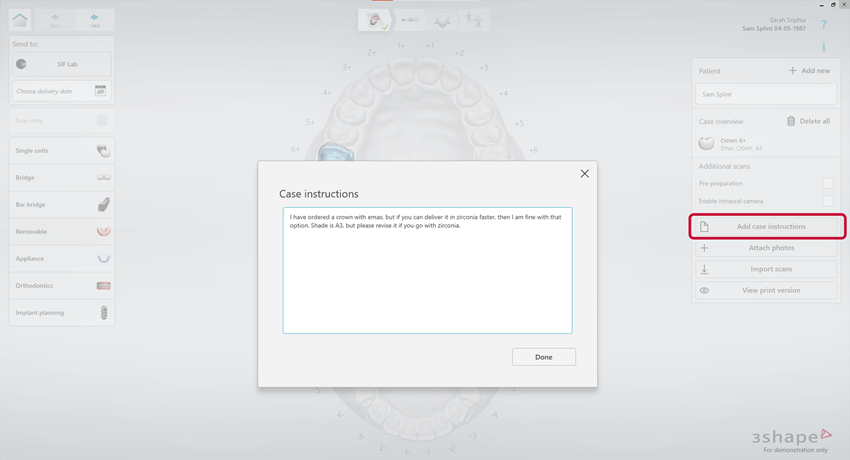
With the new update we have improved the case instructions by adding a bigger input field making it even more user friendly, as well as increasing the font size to make the text easily readable. The case instruction is now centralized on the screen when you want to write an instruction, but completely flexible – meaning you could move the dialog to the side if you for instance want to look at the 3D model in background while typing in the instructions. What you write in the guided order form can now also be viewed and edited on the send page.
Patient, Cases & Media Library
NEW Practice Management Integrations
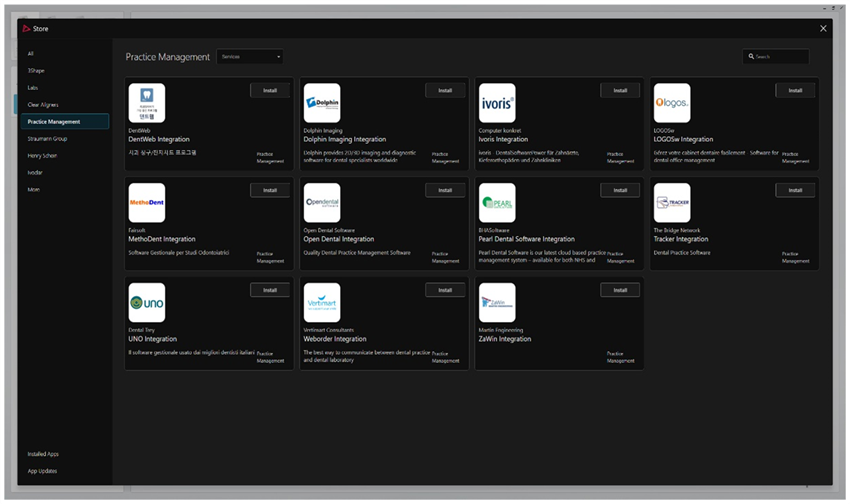
Want to save time and avoid manual errors creating patients in 3Shape Unite? We now have a growing number of Practice Management System (PMS) integrations with 3Shape Unite. These integrations allow you to create and select patients in 3Shape Unite directly from the patient journal / dental chart in your PMS. Find your PMS integration as an App in the Unite Store or consult the 3Shape Help Center.
If your PMS is missing, have your PMS vendor contact 3Shape on [email protected] to start get started.
NEW Selection dialogue automatically opens right after creating a new patient
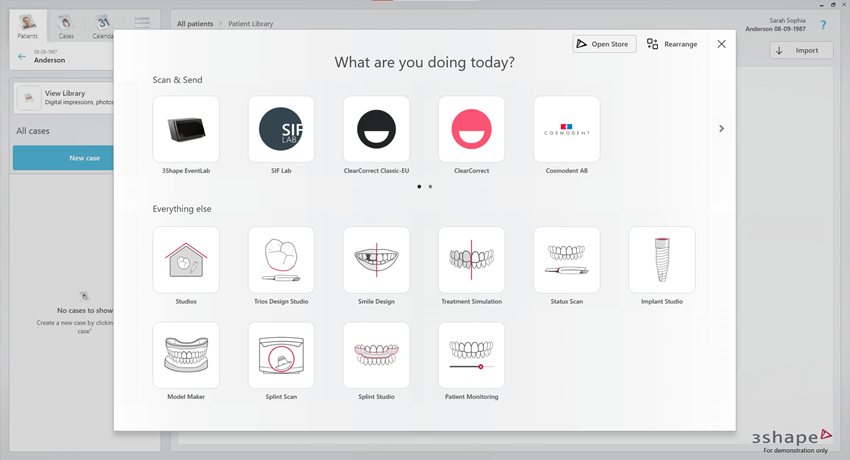
If a patient does not exist yet in the 3Shape software, and you want to quickly add them so that you can move on to the guided order form to place your order and get started with the scanning of the patient. We have improved the patient creation experience by automatically guiding you to choose your preferred lab or relevant action (lab, implant studio, smile design etc.) once you click on ‘add’ the patient. This will reduce the amount of clicks you need to get started.
NEW Improved and clearer navigation between patient, cases, and media library
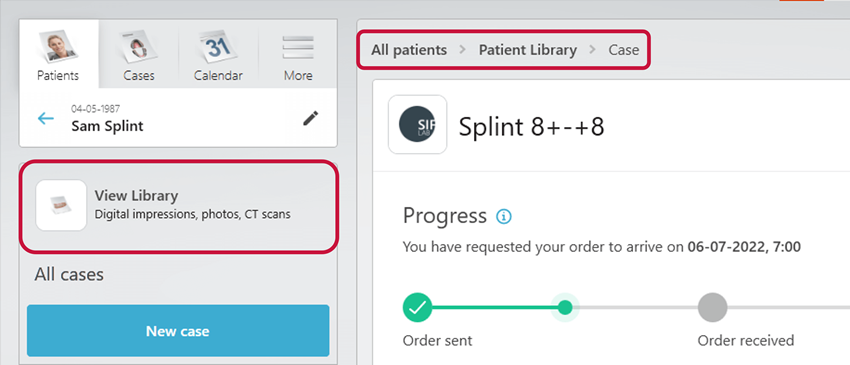
With the improved navigation we have introduced a direct button to view the media in the patient media library that you have gathered on a specific patient. Furthermore, we have created a consistent and clickable breadcrumb, where you follow how you got to a certain view in the software and to quickly get back to where you were before. For instance, if you are in the patient media library on a current patient, you can simply click on the label ‘all patients’ when you want to get started with a new patient.
RETURNED The double click option to open a case
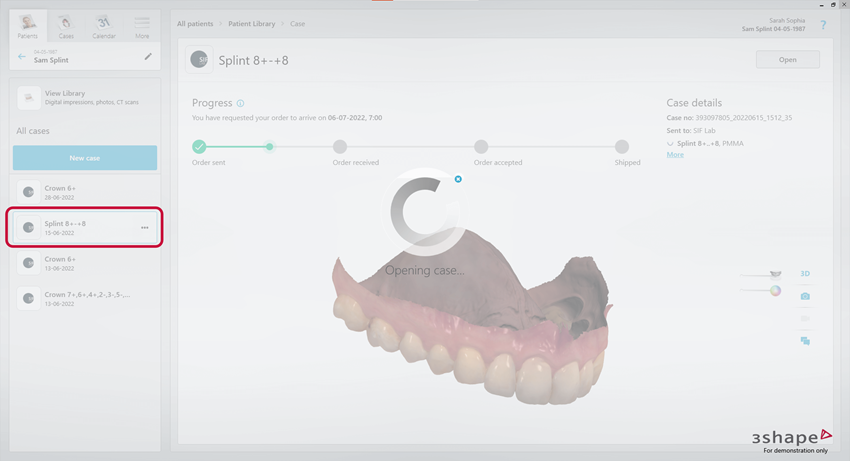
An oldie but goodie is back! Now you can once again double-click on a case to open it, allowing you to quickly review a case that is already created.
NEW Improvements to the patient search field
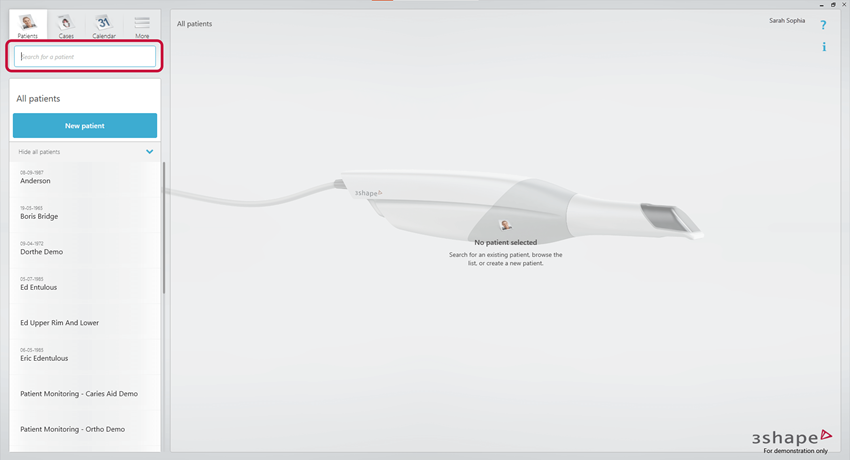
When one patient leaves the room, what you would typically do is start searching and preparing for the next patient that you will have in the chair. We have therefore made it super easy for you to quickly search for the next patient by having the patient search input field in focus, when you return to the patient page – meaning you can start typing right away and not having to click and find the input field first.
NEW Possibility to arrange and group labs in the 'what are you doing today'-dialog
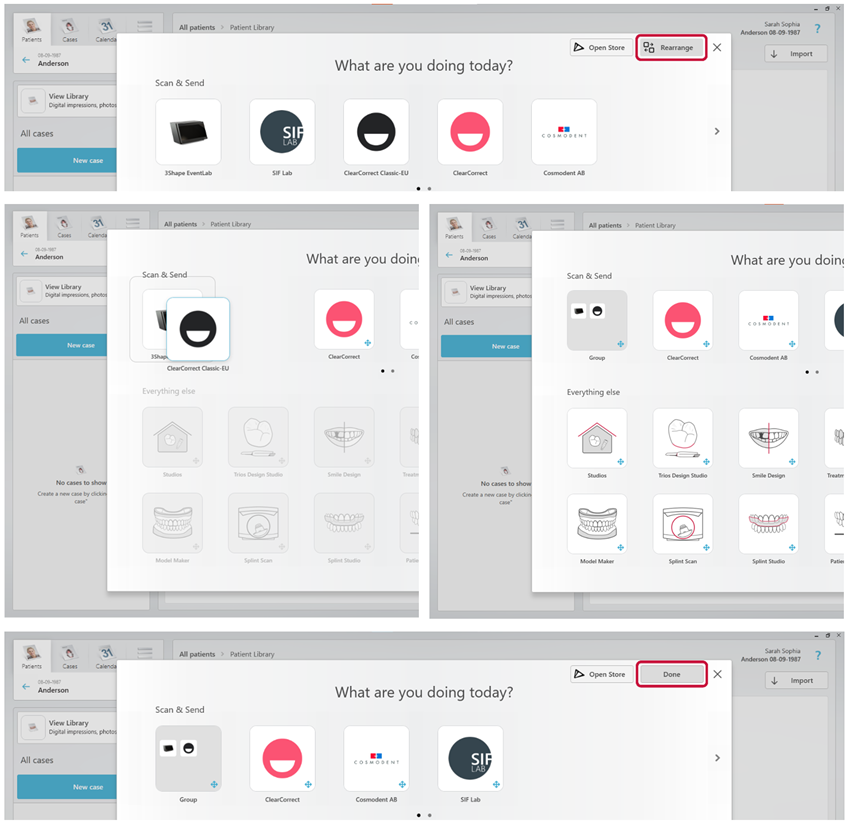
In the ‘What are you doing today’-dialog, it is now possible to arrange your lab connections in your preferred order. You can even drag them on top of each other to make and group and choose to name the group for a clearer overview so that you can quickly select the relevant lab you choose to work with.
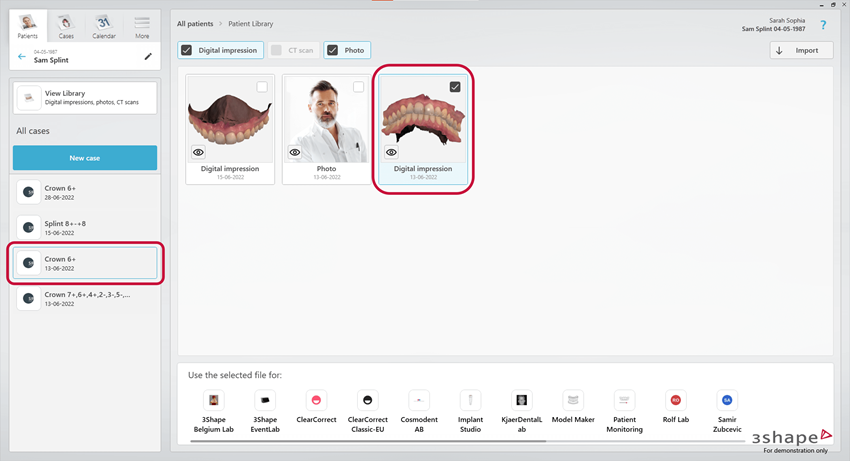
NEW Clearer link between cases and the media in patient media library and the cases
In the patient media library, we have now made it clearer which media has been used to make a case. So, if the same patient is being treated more than once, you can always go to the media library and see which scans are connected to what case, preview or review the case or even use the scan for a follow-up action.
On the Send Page
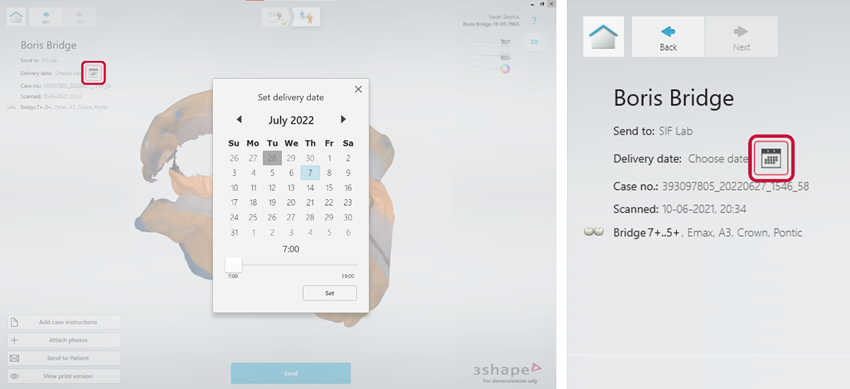
NEW Option to add the delivery date as the last thing on the send-page
Sometimes you just want to specify the indication in the guided order form and quickly get on to scanning while you have the patient in the chair. We have therefore now provided you with the option to set the delivery date as the last step before sending the case off to a lab. This means that if you click on the send button and have not set the delivery date you are no longer required to jump back to the guided order form, you can simply just make the decision on the send page.
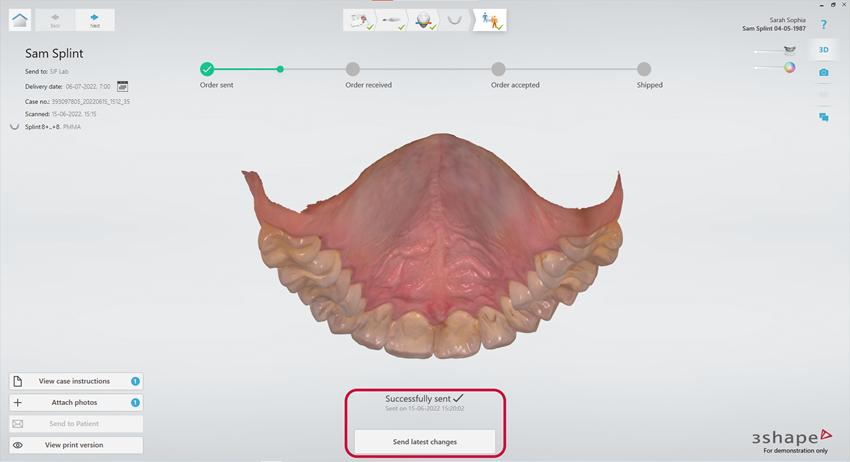
NEW Improved experience of the send and resend button UX improvements
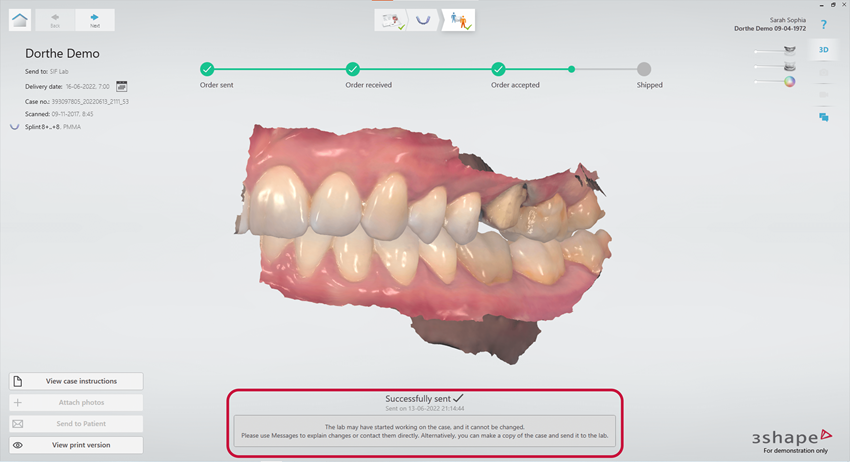
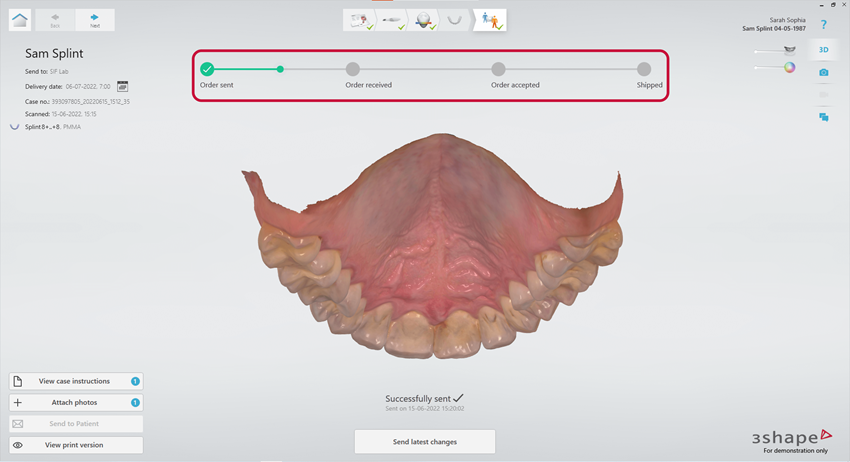
We have updated the visual experience and made it clearer when the case is sent and when you are able to resend your changes to a lab. Once the lab has received a case and started working on a case, we are guiding you to what you then can do.
When the case is sent, changes can still be made and resent.
When the case is sent, changes can no longer be made because the lab has started the work
NEW Possibility to add and edit case instructions on the send page
Now you do not have to go back to the guided order form, if you want to add a case instruction to your case before sending it off to a lab – you can do it on the send page. If you already added one in the guided order form, you have a chance to edit or review what has already been written.
NEW Now you can see order progress directly on send page
When you think about online shopping, you are always waiting for the final confirmation that your order has gone through. We provide you with the same experience by showing you on the send page that your order has successfully been sent to the lab.
NEW Way to attach images/media and send it to the lab
Like on the guided order form, you can, on the send page, as the final step before sending the case to the lab, choose to attach photos from the media library to provide a better context for the lab technician.
Communicate Mobile App
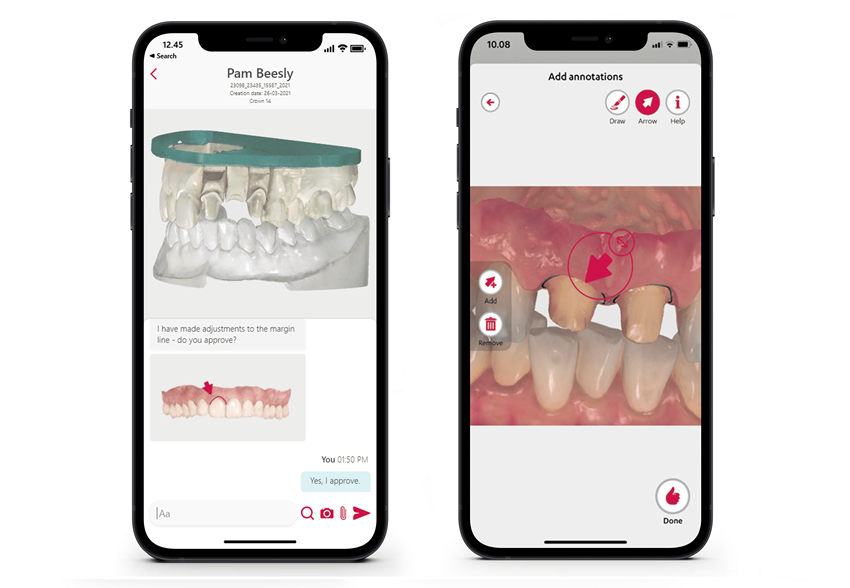
With the updated Communicate Mobile App, managing your cases and collaborating with your labs is at your fingertips – anytime, anywhere
NEW Intuitive design for easy case management
With the new and improved cases list, easily find your cases by filtering by collaborator and quickly find them by their logo.
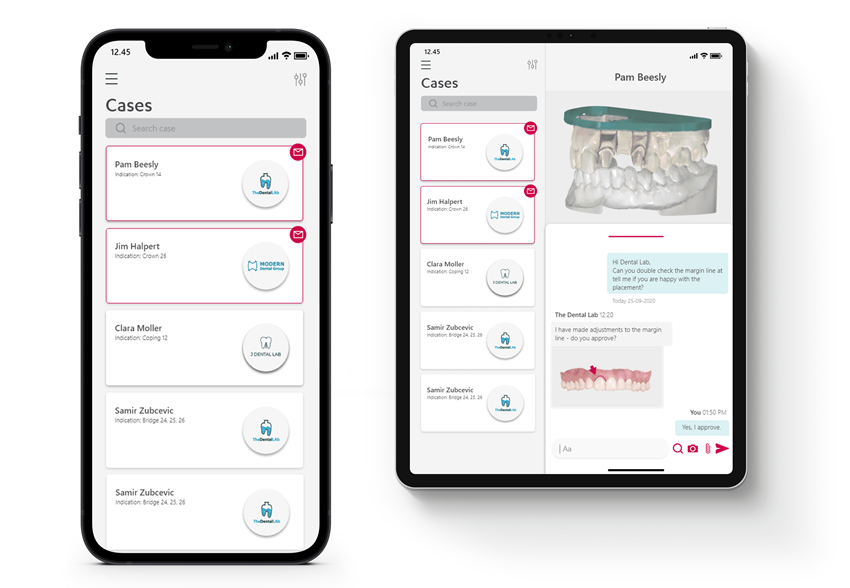
NEW Dynamic case-centric communication – all in one place
Chat with your lab and add order assets such as patient images, also directly from your phone, while the patient is in the chair. You can also annotate models for detailed input for your collaborator.
Download directly from your device’s app store:
